
• Drawing circles sounds easy, but drawing a perfect circle freehand is almost impossible.

    The 11th century artist, Giotto, was asked to send the Pope an example of his drawing skills before he was commissioned to paint a work of art. To show how good he was, he sent the Pope a perfect freehand drawing of a circle. Giotto got the job!

    You can draw circles by drawing round circular objects like plates or jar lids, or you can use a compass.

    The width between the point of the compass and the pencil is the radius of the circle. The line you create is the circumference, meeting up where you began, creating a circle centred around the point of the compass.

    A circle fits perfectly inside a square, only touching the midpoints of each the four lines that make up the outside of the square. We can use this fact to help us draw a circle freehand.

    Drawing circles freehand is not easy. You need to loosen up a bit. One good exercise is to draw circles round and round in a scribbly fashion, to get your hand moving freely and smoothly. Then draw pages of circles of different sizes.

    If you get tired, stop. there is no point practicing to draw bad circles! try and draw the best circles you can. With a little daily practice, your circles will improve.

    It might seem a bit silly drawing so many circles, but this was exactly how you learned to write your abc, filling pages with letters of the alphabet, and that worked!

    This creates what is called muscle memory. Just as you learn to ride a bicycle, you can learn to draw circles and the muscles in your hands will remember how to do it again and again, just as you don’t have to think about the physical act of writing while you write a note or a shopping list.

    Learn to draw circles confidently as so many drawn objects are based on this shape.

    Task: Draw circles. Start with some sweeping circles with maybe ten revolutions for each circle. Then fill the rest of the page with circles. Do this every day as a quick warm-up exercise and you will soon be drawing beautiful circles.

    The index for this course is at http://www.shooraynerdrawing.com/..
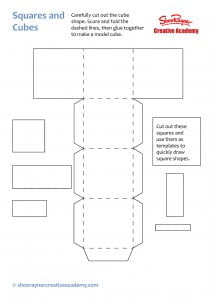

  • CubesClick the picture to download the pdf. Cut out the squares and rectangles. Use them as templates to quickly draw shapes. You can draw the square and rectangle shapes freehand, if you prefer.

    Connect pairs together and create boxes, just like we did with the triangles and prisms earlier.

    To help you get the idea of how boxes are constructed, get some cardboard boxes and pull them apart and stick them back together again. Cut out and make the box on the pdf sheet.

    Making things like boxes is good for you brain. As you cut it out the flat design, fold it up and stick it together, your brain will be building a 3D map of how a box is made.

    Eventually you want to be able to imagine a box and be able to see it from any angle all inside your head, so you can just draw it as you see it in your mind’s eye.

    This come naturally to some people, but don’t worry – the more you draw and play with 3D shapes and objects, the easier it is to imagine and manipulate those shapes in your head. It’s brain training!

    BoxesTask: using the templates or drawing freehand, draw lots and lots of boxes! Draw pages of them – every shape and size – until you feel comfortable and confident drawing the box you are seeing in your mind’s eye.

    The index for this course is at http://www.shooraynerdrawing.com/..


  • If you have done some practice work, drawing triangles and turning them into prisms, and feel you can now draw prisms, then Squares, Cubes and Boxes should be quite easy for you. Like the triangle, a square is made from points connected by lines. You don’t have to be accurate! All four sides should be of equal length and each corner should be 90 degrees, but this isn’t a geometry lesson – just draw something that feels square to you. boxes1To draw a cube, start drawing a second square with one corner placed in the middle of the first. Then join up the corners of both the squares. This is called a wireframe diagram. WireframesTwo wireframe drawings, alongside each other, both look the same. But if you erase the lines that you wouldn’t be able to see, if it were a solid object, you’ll see one cube appears to go up and the other appears to go down. Some people find it hard to see one cube when their eye has locked onto the other. Keep drawing and playing with wireframes to help your eye and brain get used to “seeing” the different aspects of 3D in the one drawing. We are tricking and teaching the eye into believing it is a 3D representation. The eye wants to be fooled, so we need to learn the tricks that are the vocabulary of drawing that the eye can read and understand. Task: Practice drawing wireframe cubes this way. One corner of the second square will be in the middle of the first square. Then join the four corners together to make a wireframe drawing of a cube. The index for this course is here.